

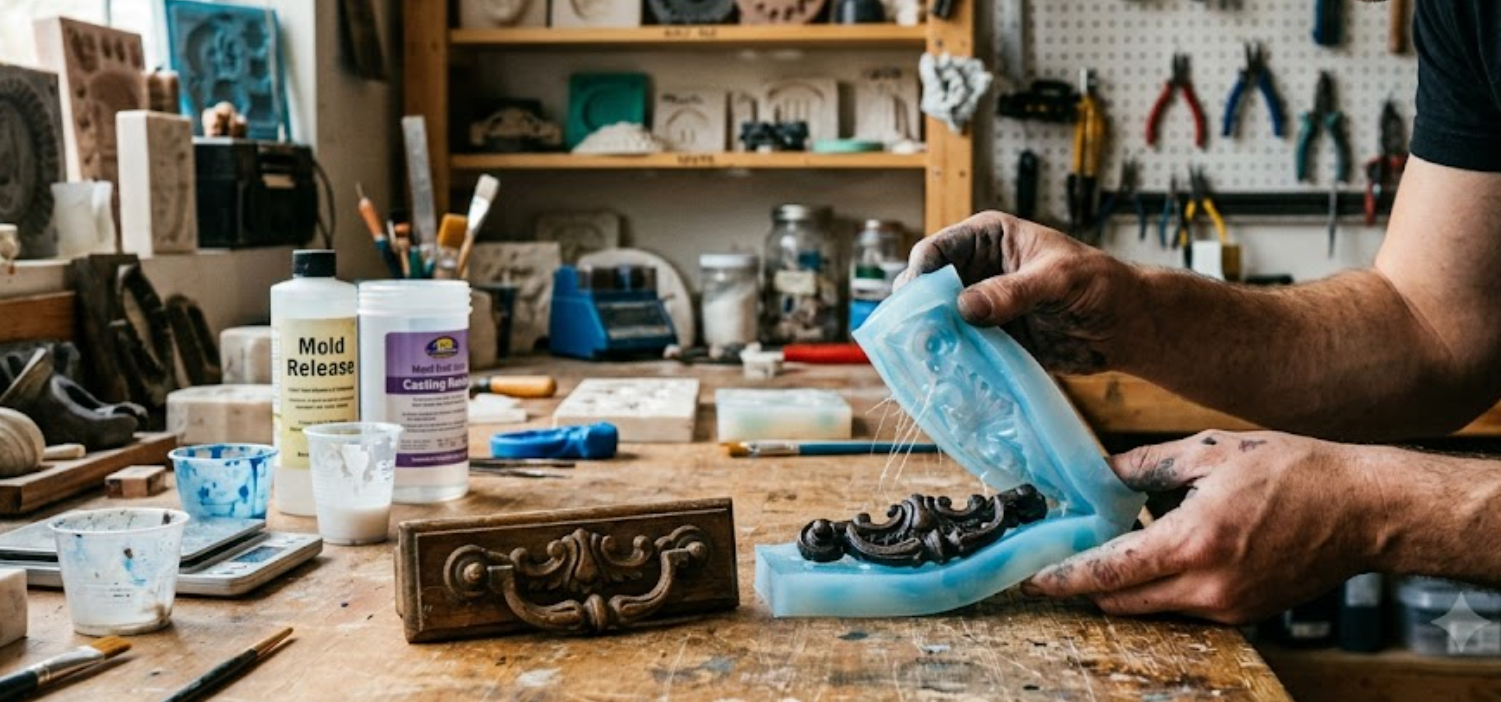
Picture this: You’ve finally tracked down that gorgeous, vintage 1960s mid-century modern credenza at a flea market. It’s got the perfect patina, the wood grain is to die for, and the price was an absolute steal. There’s just one glaring, heartbreaking catch—one of the intricately carved, iconic drawer pulls is completely missing. You search online for hours, but zip. Nada. It’s a discontinued relic of a bygone era.
A decade ago, you’d be staring at a permanent DIY disaster or paying an arm and a leg for a master craftsman to carve a replacement by hand. But today? Well, today we have a secret weapon in our creative arsenal. Enter the world of the repmold.
Whether you’re a die-hard maker, a industrial designer trying to beat a ruthless deadline, or just someone trying to fix a broken heirloom, understanding the magic of a repmold can feel like discovering a manufacturing superpower. Let’s dive deep into what this process is, why it’s a total game-changer, and how it’s blurring the lines between mass production and artisanal crafting.
The Anatomy of a Masterpiece: What Exactly is a Repmold?
Before we get ahead of ourselves, let’s clear the air. What are we actually talking about here?
Stripping away the dense engineering jargon, a repmold (short for replication mold) is a highly precise, adaptive mold created directly from an existing physical object. Unlike traditional manufacturing molds—which are painstakingly designed from scratch using complex CAD software and machined out of heavy blocks of steel—this method skips the digital drawing board entirely. It uses the physical “master” object as its own blueprint.
Think of it as the ultimate material Ctrl+C and Ctrl+V. By capturing every microscopic scratch, texture, and contour of an original item, it allows you to clone that object with terrifying accuracy.
The Materials That Make the Magic Happen
You can’t just throw any old material at a project and hope for the best. Depending on what you’re trying to copy, the replication process usually relies on a few heavy-hitting compounds:
- Silicone Elastomers: The gold standard for flexible replication. It stretches, it bends, it pulls away from complex undercuts without tearing, and it catches details down to a fingerprint.
- Polyurethane Resins: Perfect for rigid, durable outer shells (often called mother molds) that hold the flexible silicone in place so your final cast doesn’t warp.
- Epoxy Pastes: Excellent for quick, structural replications where high heat resistance or structural integrity is a must.
Why the Repmold Method Beats Traditional Tooling (By a Mile)
Let’s be real for a second. Traditional manufacturing is a slow, bureaucratic beast. If you want to mold a custom plastic part using classic injection tooling, you’re looking at weeks of design validation, thousands of dollars in CNC machining costs, and a whole lot of crossed fingers.
Stepping outside the traditional pipeline changes the game entirely. Here is why creators are ditching the old-school drafting table in favor of rapid replication techniques.
1. Speed That Borders on Time Travel
When inspiration strikes, the last thing you want to do is wait six weeks for a factory overseas to ship you a prototype tool. With a localized replication setup, you can take a 3D-printed part, pour a liquid silicone matrix over it before lunch, and be casting your first production-ready polyurethane part by dinner time. It turns a marathon into a sprint.
2. Slashing Budget Overhead to Pennies
Let’s face it, we aren’t all backed by venture capital firms with bottomless pockets. If you only need fifty pieces of a custom component for a limited-run boutique product, investing in hard steel tooling is financial suicide. The low-cost entry barrier of a flexible replication setup democratizes production, giving independent creators the leverage to compete with the big dogs without breaking the bank.
3. Preserving the Imperfectly Perfect
Here’s a hot take: digital perfection can sometimes feel incredibly soulless. When you design an object entirely in a computer, it often loses those subtle, organic imperfections that make an item feel human. Because a replication mold captures the tactile reality of a physical object—the hand-carved tool marks, the subtle grain of the wood, the weave of a fabric—the final cast retains a sense of soul that algorithms just can’t replicate.
Step-by-Step: Crafting Your Very First Repmold
Alright, enough with the theory. How do we actually pull this off in the workshop? While it might look like dark magic from the outside, breaking it down into a systematic process makes it incredibly approachable. Grab your safety glasses, because things are about to get messy.
[ Step 1: Prep the Master ] ---> [ Step 2: Build the Box ] ---> [ Step 3: Pour the Matrix ]
                                                                        |
                                                                        v
[ Step 6: First Cast ]     <--- [ Step 5: De-mold Carefully ] <--- [ Step 4: Demolding Cure ]
Step 1: Prepping the Master Object
First things first, your final clone is only going to be as good as your original. Clean your master object meticulously. Any dust, stray hairs, or fingerprints will be immortalized in your mold. If the object is porous (like wood or unglazed ceramic), hit it with a light coat of sealer so it doesn’t soak up your molding compound like a sponge. Don’t forget the mold release agent! Skipping this step is a one-way ticket to permanently gluing your precious original inside a block of rubber. Talk about a nightmare.
Step 2: Building the Containment Vessel
You need a container to hold the liquid magic while it cures. You don’t need anything fancy here—corrugated plastic, foam core, or even old LEGO bricks work brilliantly. Build a box around your object, leaving about a half-inch of clearance on all sides. Seal the edges of the box with hot glue to prevent any catastrophic, midnight leaks across your workbench.
Step 3: Mixing and Pouring the Compound
When measuring out your silicone or polyurethane, precision is your best friend. Use a digital scale and follow the manufacturer’s mix ratios to the letter. Once mixed, here’s the pro-tip: pour the liquid in a super thin, high stream into the lowest point of the mold box. Let the material rise up and submerge the object naturally. This forces air bubbles up and away from the surface, preventing nasty blemishes on your final cast.
Step 4: The Waiting Game and Extraction
Now, we wait. Resist the temptation to poke at it! Let it fully cure for the recommended time. Once solid, dismantle your containment box and gently flex the mold to break the seal. Pop out your original master, and boom—you are now holding a flawless, inverted photographic negative of your object. You’re officially ready to start cloning.
From Hollywood to Garages: Real-World Applications
It’s easy to think of this as a niche hobbyist trick, but look closer and you’ll see this exact methodology everywhere. It’s the silent workhorse behind some of the most visually stunning industries on earth.
Special Effects and Prop Making
Ever wonder how a film crew manages to have twenty identical, hyper-realistic stunt swords for an epic battle scene? They don’t have a blacksmith working overtime. The prop department creates one gorgeous, hero prop out of metal and wood, creates a high-fidelity flexible mold, and cranks out dozens of lightweight, safe, rubber duplicates.
Architectural Restoration
When centuries-old cathedrals or historical brownstones begin to crumble, you can’t just walk into a local hardware store and buy matching plaster crown molding. Restoration experts will salvage a single intact fragment of the original plasterwork, create a specialized repmold, and use it to cast hundreds of feet of identical trim, seamlessly blending the old world with the new.
“In the field of historical preservation, replication molds aren’t just tools; they are bridges across time, allowing us to replicate the touch of masters who died centuries ago.” — Archival Restoration Quarterly
Common Pitfalls (And How to Dodge Them Like a Pro)
Look, nobody’s perfect, and your first attempt might end up looking a bit wonky. It’s a rite of passage! But to save you some heartache, let’s run through the classic blunders that plague beginners.
- The Trapped Air Bubble: Nothing ruins a perfect cast faster than a giant air pocket right on the tip of your object’s nose. To avoid this, use a brush to paint a thin “detail coat” of liquid silicone directly onto the master before pouring the rest of the mold.
- The Incurable Sticky Mess: If your mold material remains a gooey, sticky soup days after pouring, you’ve likely fallen victim to cure inhibition. Certain materials, like sulfur-based clays or certain 3D printing resins, chemically clash with platinum-cure silicones. Always run a small test patch if you’re unsure about material compatibility.
- The Warped Cast: If your mold walls are too thin, the weight of the casting resin will cause the mold to sag, resulting in a distorted, misshapen clone. Don’t skimp on material thickness, or build a rigid mother mold to back it up.
Wrapping Up: The Future of Making
At the end of the day, the power of the repmold lies in its beautiful accessibility. It bridges the gap between high-tech digital manufacturing and the tactile, messy reality of hands-on crafting. It empowers the tinkerer, rescues the historic, and streamlines the commercial.
So, the next time you find yourself staring at a broken component, an irreplaceable antique, or a prototype that needs duplicating, don’t throw your hands up in defeat. Grab some silicone, mix up a batch, and mold your own solution. After all, why buy the world when you can replicate it?
Frequently Asked Questions
How many times can you reuse a single replication mold?
It largely depends on the material you are casting into it. If you are casting gentle materials like plaster or wax, a high-quality silicone mold can easily last for hundreds of pours. However, if you are casting aggressive polyurethane resins—which generate a lot of heat (exothermic reaction) and chemically attack the mold—you might notice the mold tearing or losing detail after 20 to 30 casts.
Can I make a mold out of an object with complex holes and hollow spaces?
You bet! But you’ll need to design a multi-part mold (like a two-part or three-part block mold) rather than a simple one-piece pour. This involves creating a parting line using clay, pouring the first half, letting it cure, removing the clay, and then pouring the second half. Just don’t forget to use mold release between the two halves, or you’ll end up with a solid block of rubber!
Is this process safe to do inside an apartment?
Generally speaking, yes, provided you choose the right materials and keep a window cracked. Most modern platinum-cure silicones are completely odorless and non-toxic. However, many casting resins and polyurethane compounds emit strong fumes and require proper ventilation, nitrile gloves, and a respirator. Always read the safety data sheets (SDS) before cooking up a storm in your living room.

